

If you are like me this is an exciting time of the year. I can begin to start my seeds for spring and summer! Yahoo! In Southern California we can grow something all year long, but let’s face it, brassicas and root veggies get a bit boring after a few months. The end of January you can start your tomatoes under cover (ie home or greenhouse) and you can continue to plant brassicas and root vegetables. A short list of veggies that you can start indoors at this time is: broccoli, Brussel sprouts, cabbages, chamomile, cauliflower, cherivil, chives, cilantro, dill, fennel lettuces, spinach, tomatoes. Below is a list of indoor and outdoor fall and winter planting dates. http://celosangeles.ucanr.edu/files/131791.pdf
So what did I start? Well I just got a new handy dandy seed starting tray with 162 cells and I went to town! I planted three types of tomatoes- Marzano Roma, Tappy’s Heritage and Bonny Best. I chose these three because of their heat and disease resistance as well as productivity and flavor. Along with the tomatoes I planted Early White Vienna Kohlrabi, Pixie Baby Cabbage, Heirloom Dino Kale (Lacinato), Scarlet Kale, Dutch Beets-Red Baron, Parade salad scallions and mixed colors swiss chard. For the most part my seeds were from Baker Creek Heirloom Seeds https://www.rareseeds.com/ and Renee’s Garden https://www.reneesgarden.com/
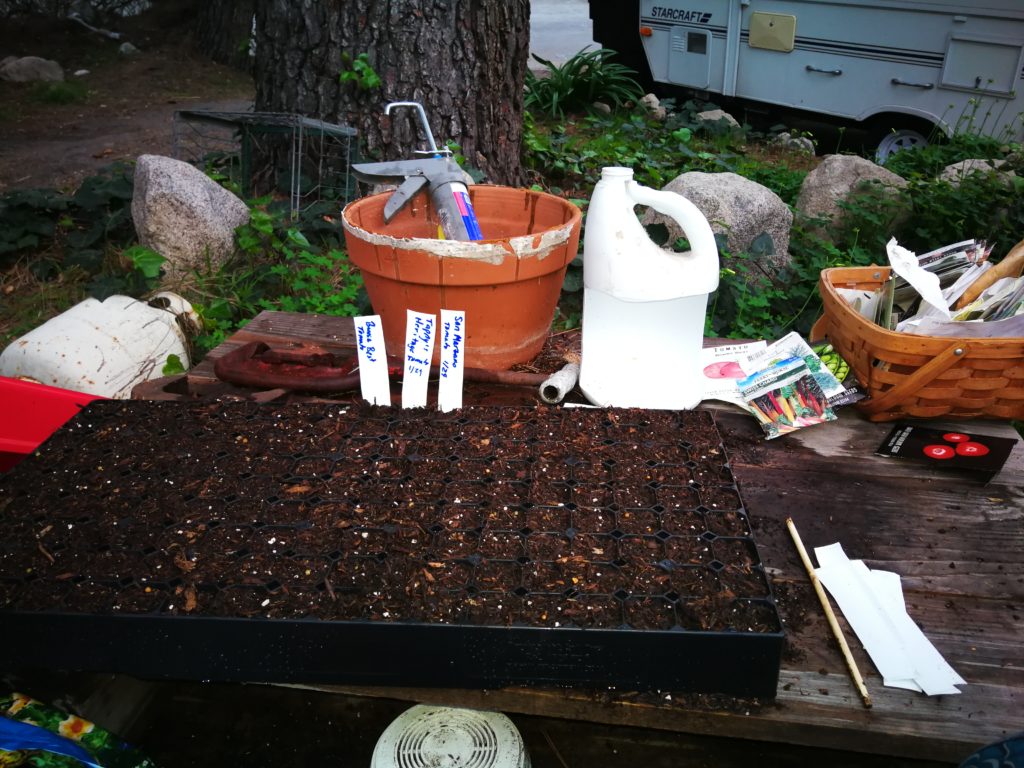
I have tried many different ways of starting seeds, everything from Dixie cups to peat pellet starters. I changed to this method because is both economical, space saving and environmentally responsible. The first step is to fill the tray with potting soil, homemade compost or your favorite medium. Next you use two fingers and pack the soil down in each of the cells and fill the indentations. The reason that you do this is that it prevents air pockets and seeds prefer firm soil to sprout. Next I watered the soil so that is damp, not soggy. I made some home made markers out of an old bleach bottle and labeled each row so that I would remember what was planted. Some seedlings look very similar.
The next step is to plant the seeds according to their depth instructions on the package. I use a chopstick that is marked at quarter inch intervals to make a divot to put plant the seeds. Next firm the soil over the seed.
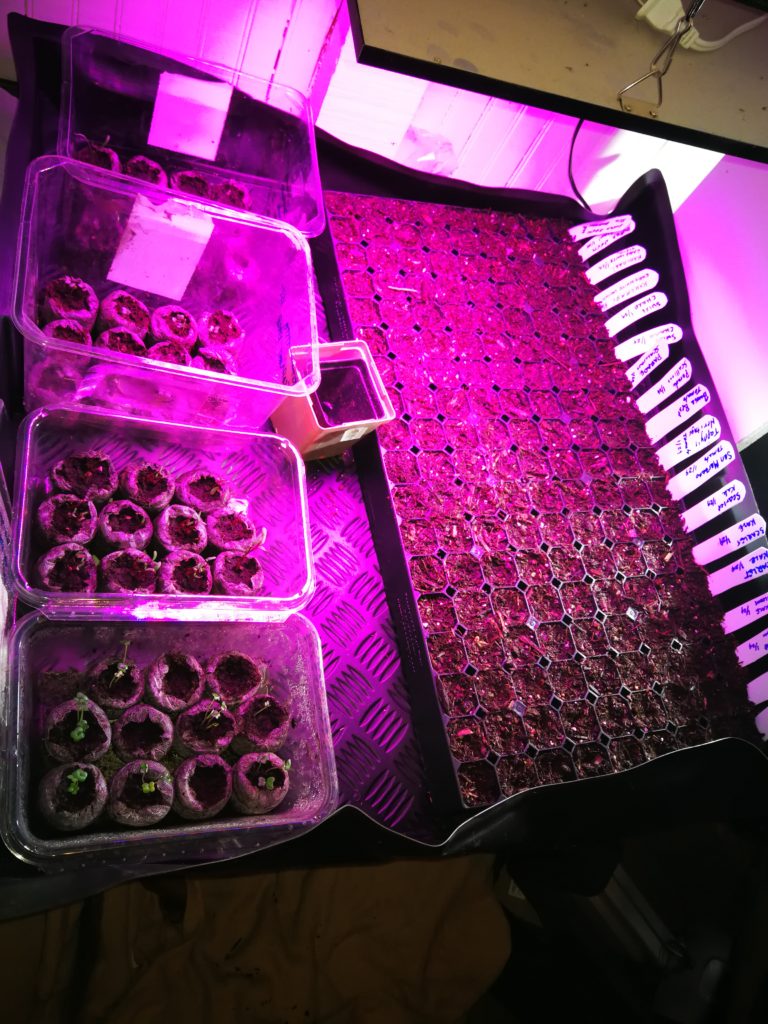
As you can see I still have some seedlings growing in my old method using peat pods. This is a very space consuming and not environmentally sound way to start the seeds. I have a seed starting heat pad under the tray because our home does not stay consistently warm and I get a better result in both sprouting time as well as percentage that sprout using the heat. I got the seed propagation tray (another is on the way!) and the flexible growing tray to catch xtra water from GreenHouse MegaStore https://www.greenhousemegastore.com/
And FYI- I get no kickbacks from these companies, they are just what I use.